DIY PROJECT
You will need:
- Backrest board (pine is fine, or use hardwood if desired)
- Shelf board (pine is fine, or use hardwood if desired)
- Wood Glue
- Wood Screws
- 1/4″ Drill Bit and Wood Dowel
- Finishing Nails
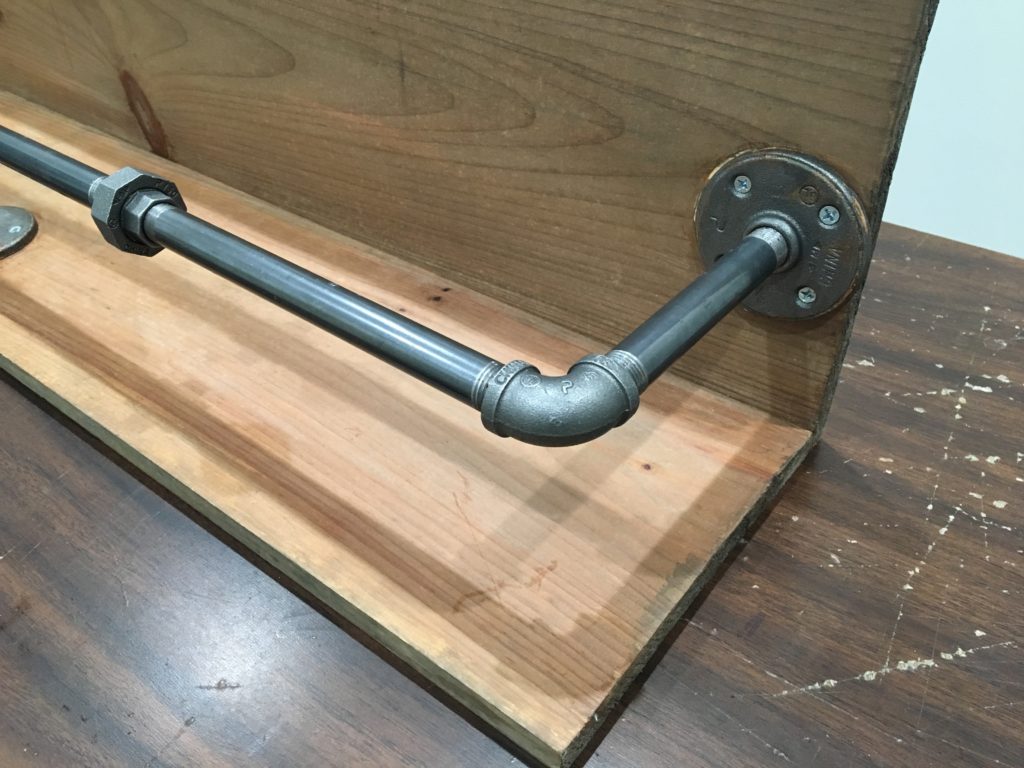
- 1/2″ Black Iron Floor Flange (3 pcs)
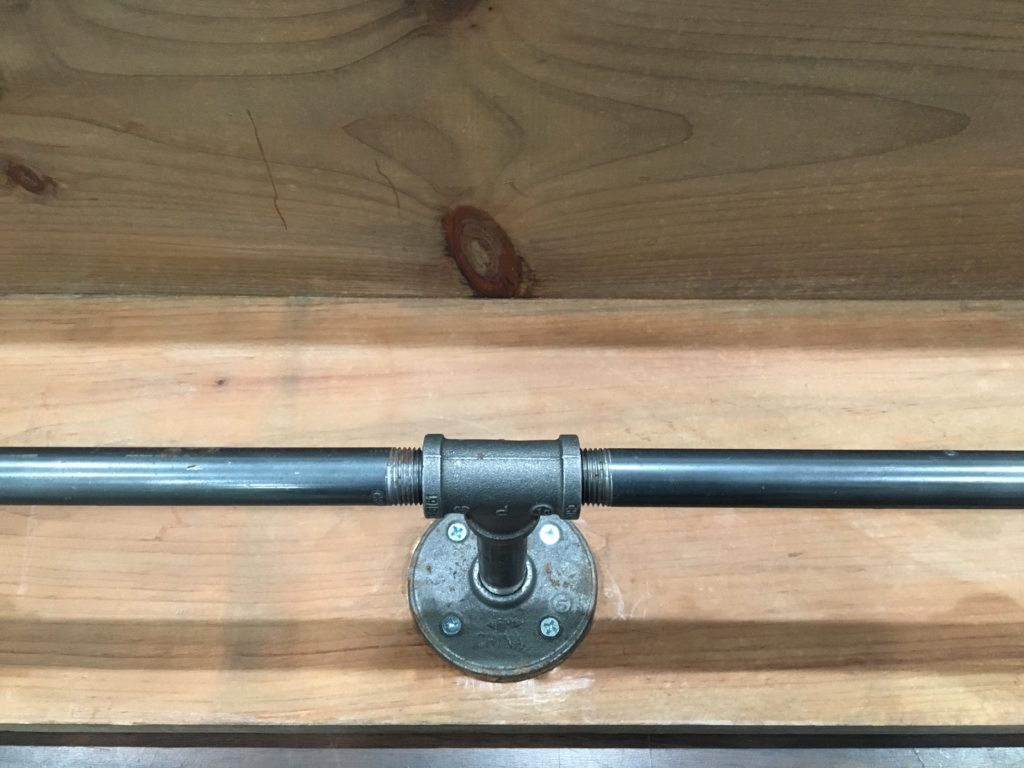
- 1/2″ Black Iron Tee
- 1/2″ Black Iron Elbow (2 pcs)
- 1/2″ Black Iron Pipe Coupling or Union (2 pcs)
- 1/2″ Black Iron Pipe Nipples (varying lengths depending on desired dimensions): 2 to extend from flanges on backrest board to elbows at corners; 4 for the front; 1 to connect tee to flange on shelf board
How To:
1. First, determine the desired height, width and depth of your shelf. This will dictate how long you need your pipe nipples to be.
2. Stain, paint, or otherwise finish boards to match your aesthetic.
3. Fasten the shelf board to the backrest board using wooden dowels with wood glue, finish nails, screws or any desired combination thereof.
-If using dowels, drill through the backrest into the shelf using ¼” drill bit and then apply wood glue and tap dowels into the holes.
-If using screws, pre-drill holes to avoid splitting the shelf board.
*Ultimately, the pipe fittings will support the weight of the shelf so don’t worry if the shelf doesn’t seem sturdy yet.
4. Assemble pipe structure. Hand tighten fittings. It is not necessary to apply thread seal or use wrenches.
5. Use wood screws to secure flanges to the backrest and shelf boards.
*Length of screws depends on the thickness of the wood—they should not protrude through the other side. (We used #10 x 5/8 wood screws.)
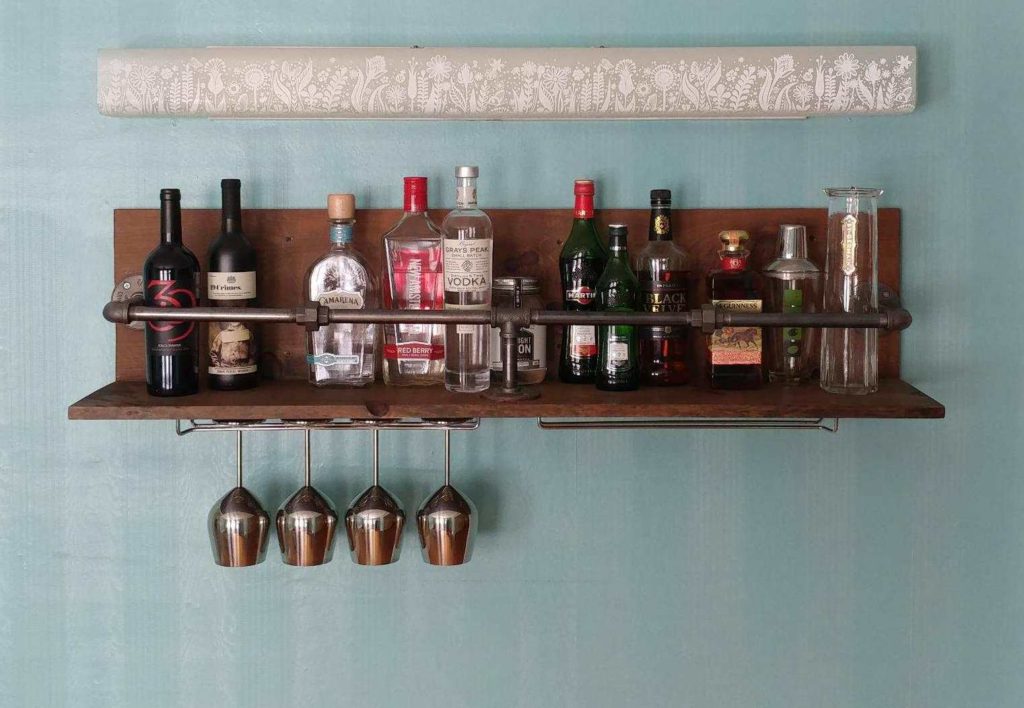
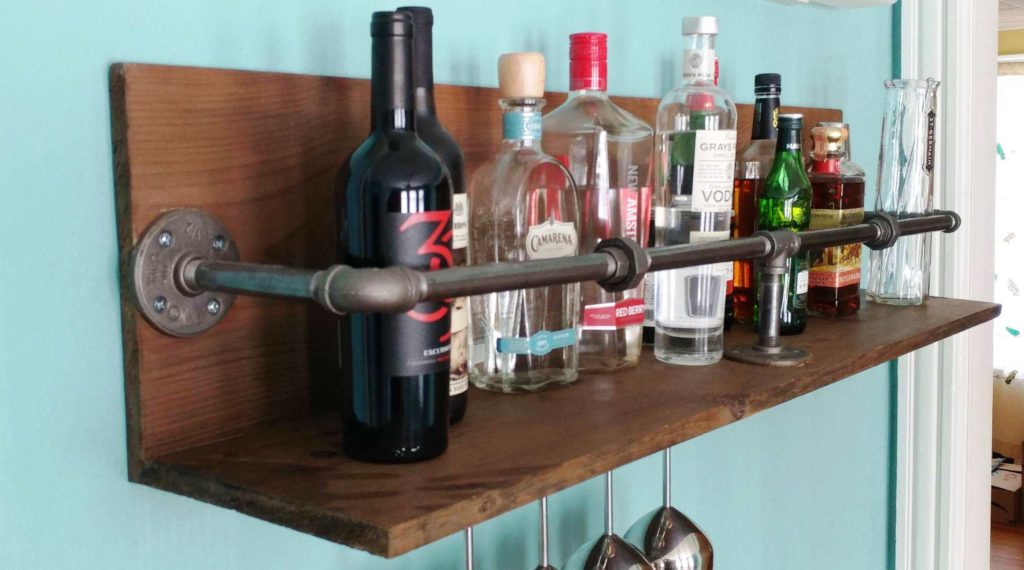
6. Hang shelf by screwing wood screws through the backrest into wall studs. Fill with bottles, plants, books…almost anything…and enjoy!

Watch our “How To” video here: https://youtu.be/00pt-A5Dd-M
Find us on YouTube, Facebook, Instagram, Pinterest, and Twitter!